How to make a comfortable greenhouse for cucumbers with your own hands: step by step instructions
A greenhouse for cucumbers can be made with your own hands from scrap materials. It will cost less than the purchased option and can ideally fit into the site, since the dimensions of the structure will initially be calculated for specific conditions. However, building your own greenhouse for cucumbers will take time and labor. In addition, the gardener needs to decide on the material and size of the future greenhouse.
Greenhouse types
A greenhouse is often called a mini-greenhouse, since its height is usually no more than 1.5 m. It is rather difficult to enter such a greenhouse, therefore, to carry out top dressing, watering and other work, it is necessary to completely or partially remove the outer layer of the film.
Small structures can have different designs, for example:
- arch made of metal arcs;
- hut (roof) made of wooden slats;
- "Butterfly" - construction with 2 opening doors.
Greenhouses are also classified depending on the material.
The frame is made:
- made of polycarbonate;
- made of wood;
- made of plastic.
The greenhouse cover can be:
- film;
- from non-woven materials;
- from glass.
You can also distinguish types of greenhouses, depending on their purpose:
- Temporary structures (small metal arches with a stretched film or non-woven material) serve as a shelter for cucumbers from frost, wind and other negative influences.
- Stationary greenhouses are made for several seasons in order to constantly grow cucumbers and other crops in the same place.
- Portable greenhouses are small structures that can be placed anywhere on the site, even where there is no land (soil is poured directly onto the bottom of the greenhouse).
How to choose sizes?
The choice of a particular type of greenhouse depends on the number of seedlings, local climatic conditions and the size of the site. Basically, for the dacha cultivation of cucumbers, small greenhouses are built with dimensions not exceeding 3-4 m in length, 1.5 m in width and the same height. A small greenhouse maximally saves the area of the site, which can be used for other plantings.
Self-made greenhouses with large parameters turn out to be fragile. They can be destroyed by wind and heavy rainfall. As a result, a fragile greenhouse can simply fold over and crush the cucumber lashes.
To get an accurate idea of the size of the structure, you must:
- Decide on the location of the greenhouse and measure the length and width of the site.
- Decide on the number of cucumber seedlings. Usually planted 2-3 pieces per 1 m2, but the specific value may vary depending on the characteristics of the selected variety.
- Calculate the area of the future greenhouse in square meters.
- Select the type of structure (for example, a hut, butterfly or arched) and draw up a drawing.
- Transfer drawings to materials, make the necessary cuts.
It is always necessary to plan a drawing of a greenhouse with a margin of 10-15 cm on each side - that is, the building should not be located close to the fence, shed and other stationary structures. In addition, it is better to arrange the greenhouse so that there is free access to it from all sides.
Material selection
To choose the right material, they pay attention to the climatic features of the area. In addition, you need to understand what advantages and disadvantages this or that material has.
- Metal carcass

The metal-based frame (aluminum profiles) is easy to use, reliable enough, therefore it serves for several years.Metal does not take up much space; a small greenhouse erected is well suited for a small area. The profiles are quite expensive, but due to their durability, the costs are justified.
- Plastic frame
This is the most affordable way due to the low cost of the material. Working with plastic is also very simple, and its service life is several years. But, despite the strength, the design of the greenhouse is very light, so it must be reinforced with something. Otherwise, it will collapse at the first strong wind.
- Wooden frame
It is also notable for its cheapness, in addition, slats and bars can probably be found at the dacha itself. Another advantage of wood is its reliability and stability. Among the disadvantages of the material is decomposition under the influence of moisture. Wood must be treated with a special antiseptic or improvised means - for example, a solution of copper sulfate (1%).
- Polycarbonate
Stable, durable and reliable material that serves for several years. It creates a powerful greenhouse effect by keeping the temperature and humidity levels high enough. In addition, polycarbonate scatters the sun's rays, so that seedling leaves and fruits do not burn on a hot day. Among the disadvantages is fragility with prolonged exposure to gravity. From the roof of such a greenhouse, you need to constantly clean off the snow, otherwise it may break.
- Polyethylene film

It protects well from frost, maintains a high level of humidity. Affordable, but the cost depends on the thickness of the material: the denser the film, the better and the more expensive it is. As a rule, summer residents choose a single-layer film, the thickness of which is in the range of 80-200 microns.
The best film for long-term operation is a two-layer reinforced film (thickness of each layer is 100 microns). A nylon line is inserted between these layers, which ensures the strength of the entire material. Another reliable option is a three-layer film with a total thickness of 400-450 microns with a bubble layer. The air retains heat well, protecting cucumbers from the negative effects of night frosts.
If there are too many cloudy days in the region, a special light-converting film can be purchased. It refracts the sun's rays, including scattered ones, so that the plants receive the optimal amount of energy both in sunny and cloudy weather.
- Agrofiber
Sometimes artificial nonwovens are also used to cover greenhouses for cucumbers. The most common of these is agrofibre no more than 50-60 microns thick. Such a canvas is especially useful in regions with hot sunny summers. Due to its structure, it retains heat well, but at the same time scatters the rays and protects the seedlings from excess solar energy. Another advantage is that agrofibre allows moisture to pass through, so when it rains, cucumbers receive natural watering.
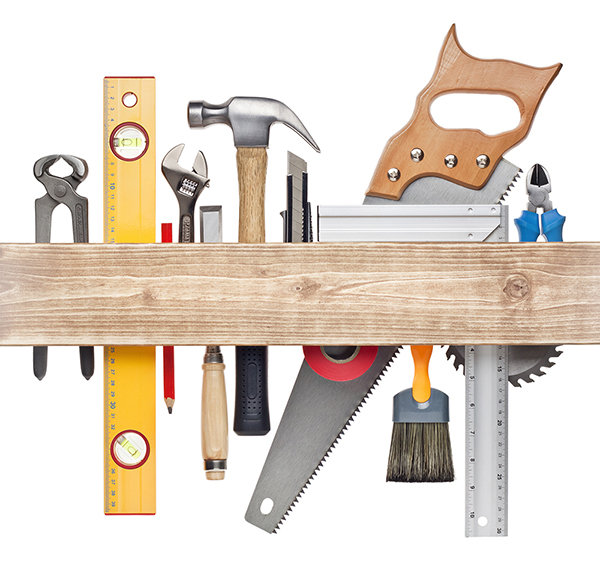
Instrument preparation
To create a small greenhouse, you will need the usual tools, which are likely to be found in any summer cottage:
- a hammer;
- shovel;
- saw;
- a circular saw;
- universal shears for metal with straight cut;
- self-tapping screws;
- nails;
- screwdriwer set;
- screwdriver;
- level;
- roulette;
- pencil, ruler and paper for drawing up a drawing.
Old metal pipes, window frames, wires, wooden bars, slats, plywood, etc. are used as improvised means.
5 simple greenhouse designs: step by step instructions
The best greenhouses for cucumbers are simple and reliable in design. To choose the appropriate option, it is necessary to clarify the required dimensions and analyze the climatic features of the region. After that, you can decide on the design, purchase the necessary materials and tools and create a greenhouse using the step-by-step instructions below.
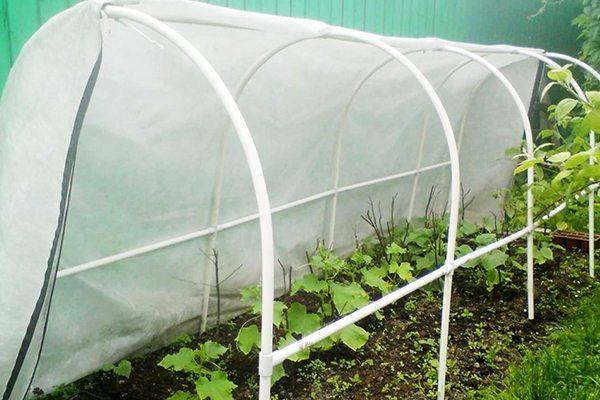
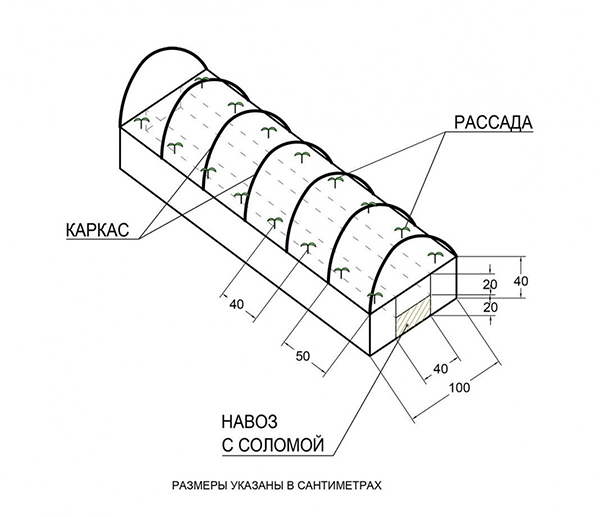
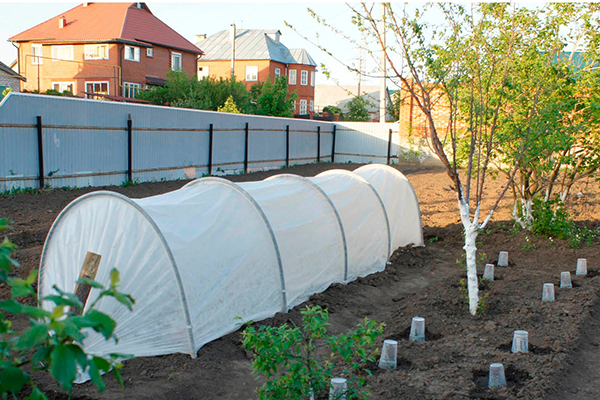
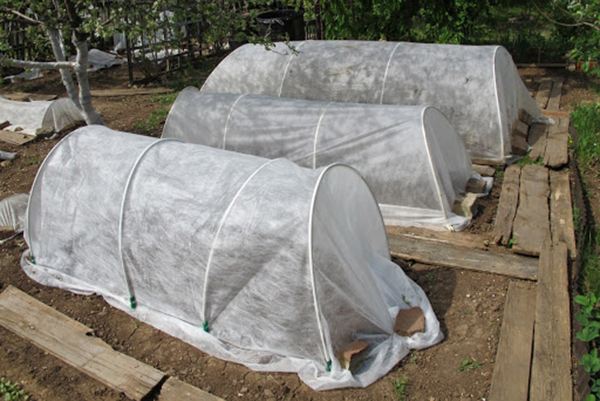
Film tunnel
This is one of the simplest greenhouse designs, which can be done like this:
- First, a place is marked on the site and a trench is dug about 50 cm deep.
- Then a layer of waterproofing based on sand, gravel and crushed stone is laid in it.
- After that, put the soil, into which you can immediately add humus, straw, last year's leaves.
- Metal arcs are placed along the trench so that an "arcade" is formed over the depression. The interval between elements is from 50 cm.
- A wire is pulled over the trench, fastening it to the installed arches.
- Cover the top with transparent plastic wrap.
- Strengthen the film with pegs dug in on each side.
Do not immediately transfer the seedlings to the greenhouse. It must stand closed for several days in order to form an optimal microclimate inside.
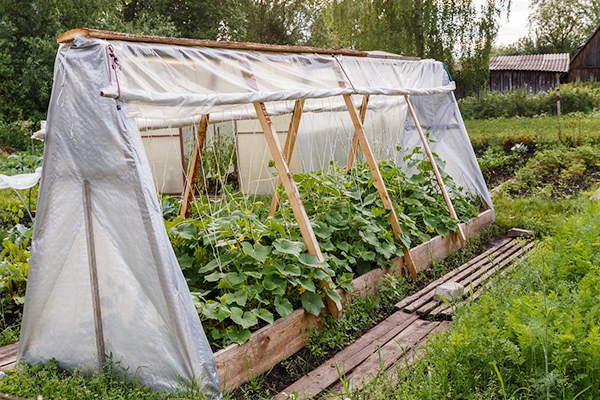
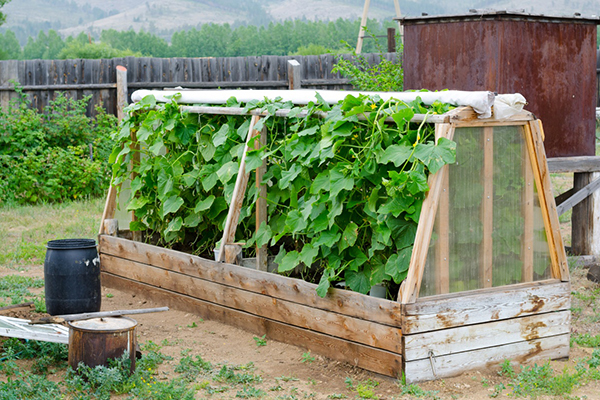
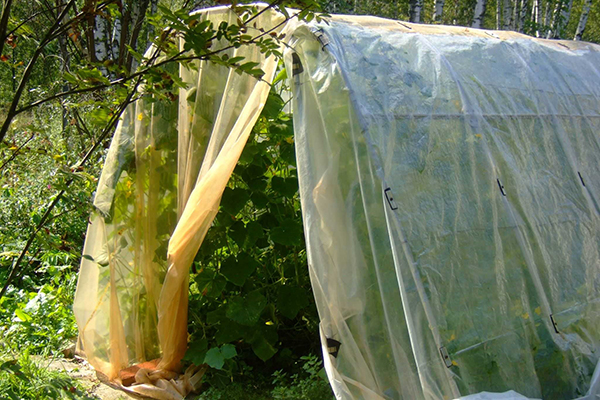
Hut
This is another simple DIY cucumber greenhouse model. The technology of its construction is about the same as that of a film greenhouse. However, in this case, not metal arches are used, but other materials:
- wooden beam (in the section 4 * 4 cm);
- wooden rods (you can take slats);
- nylon mesh;
- polyethylene film;
- strong rope.
The sequence of actions is as follows:
- First, markings are applied on the ground - up to 1 m wide, up to 3 m long.
- Then 2 bars are dug into the ground, setting them vertically (these are the load-bearing parts that will support the entire structure).
- They are connected with a horizontal bar - the result is a "gate".
- Rails or rods are attached to the upper jumper at a distance of 40-50 cm.
- A nylon mesh and a film are attached to them with a rope - and the greenhouse is ready for use.
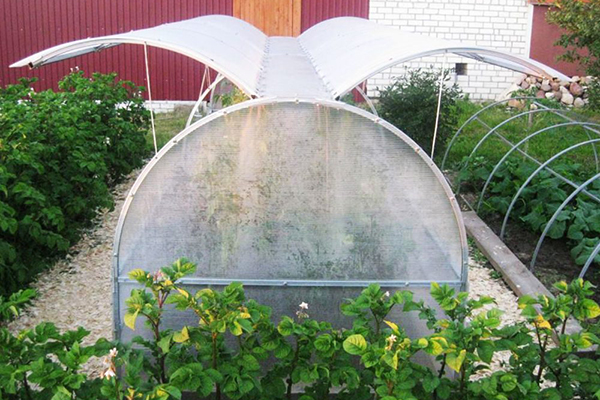
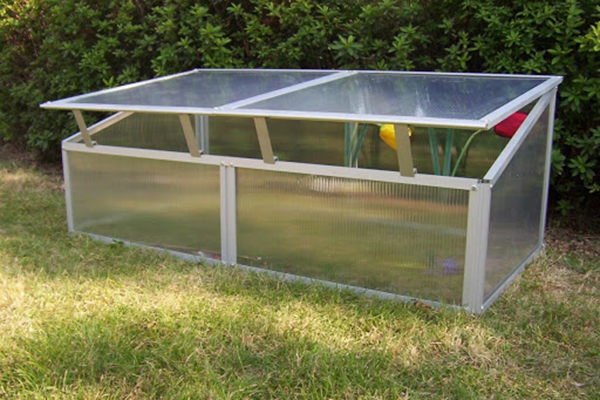
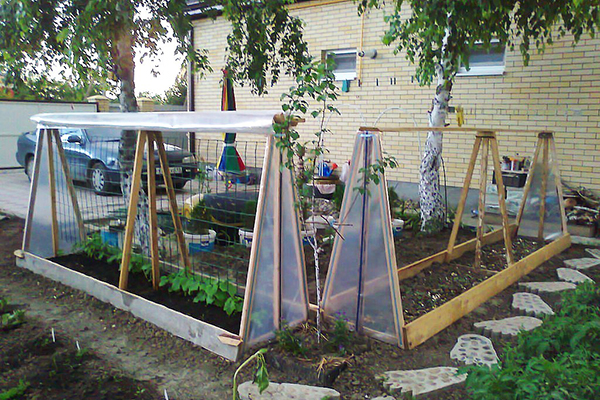
Greenhouse "Butterfly"
This is one of the most popular options for mini-greenhouses, since it takes up a minimum of space and reliably protects cucumbers from the cold, and also allows them to be regularly ventilated on fine days.
Greenhouse construction instructions:
- Mark a spot on the site, clean and level it.
- Dig a trench exactly around the perimeter, lay a waterproofing of gravel and sand.
- The corners of the trenches are reinforced, a solution of cement and sand in water is poured around the entire perimeter (respectively 2: 4: 1).

- The foundation of the greenhouse should be completely hardened in a few days.
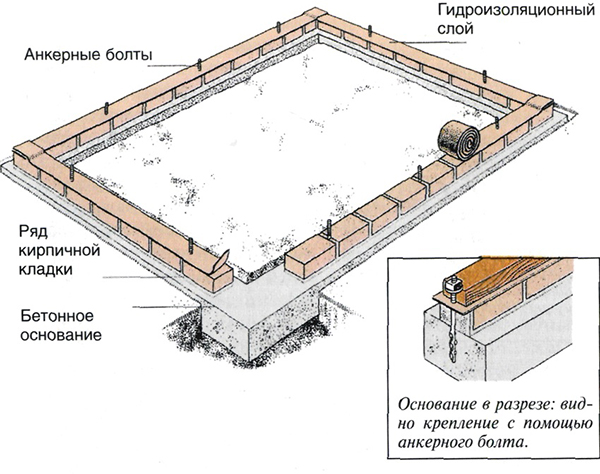
- A plinth is mounted on the foundation - for this it is enough to lay out 1 row of bricks.
- A pre-cut waterproofing layer is laid on top of this row. Its width corresponds exactly to the width of the row of bricks. Fastening is done using anchor bolts, which are set in cement (gaps between bricks).
- At this time, you can start assembling a greenhouse frame made of plastic or aluminum profiles. Metal products are fastened by welding, and plastic elements - using bolts, which can also be used for profiles. In section, the frame is an arch. Its main part is the central lintel, which runs along its entire length (the shutters are attached to it). Therefore, metal profiles are bent using available tools, as clearly shown in the video. If there is no such equipment, pipes can be bent at a specialized company.
- Hinges for future sashes are attached to the lintel: it is best to do this with bolts.
- At the same stage, the surface of the frame is covered with an anti-corrosion compound. While it dries up, polycarbonate sheets are measured and cut. A circular saw works well for such work.
- The leaves are made from semicircular fragments, cut in half. The number of these half-arcs depends on the length of the butterfly; as a result, it is multiplied by 2 - an equal amount for each leaf on both sides. Each element must have a pin - a profile will abut against it, which will keep the sash open.
- These half-arcs are fixed to the lintel using previously mounted hinges, and in the lower part they are attached to the straight profile with self-tapping screws. The result is a ready-made sash for the future greenhouse.
- It remains only to cover it with a sheet of polycarbonate, and also attach a handle to the bottom. The flaps can be opened and fixed in this position using a profile that is placed on a pin.
- A particularly important stage is the fastening of the frame to the foundation. This can be done using anchor bolts. You can see the whole process clearly on the example of assembling a metal frame in the video.
The above-described version of the greenhouse can be called a capital structure. However, it is allowed to create a simpler version of the greenhouse. The stage with the formation of the foundation can be replaced by installing powerful wooden beams around the perimeter of the greenhouse. Then the structure itself is installed on it - the further sequence of actions is exactly the same.
Polycarbonate greenhouse
This is a classic version of a reliable stationary greenhouse that, if properly assembled, will last for many years. For its construction, a foundation must be created, which can be made from:
- wooden bar (section width - 5 * 5 cm or more);
- bricks (2-3 rows can be laid);
- made of concrete and reinforcement similar to that described for the previous model.
Further work is related to the installation of the greenhouse frame and its installation on the foundation. It is desirable to make the frame from a metal pipe or aluminum profile. To work with these materials you will need a grinder, but if this is problematic, you can order work in the workshop. In any case, this option will cost less than a purchased greenhouse. The frame is placed on the foundation using anchor bolts.
The maximum interval between adjacent elements of the greenhouse frame is 50 cm. Then, polycarbonate sheets are attached to the resulting base (using self-tapping screws). They are laid with an overlap of about 5–8 cm, and from the outside they are additionally fastened with steel or aluminum adhesive tape. Then the door is mounted and, if desired, a small window (opening "window" to create a draft during airing).
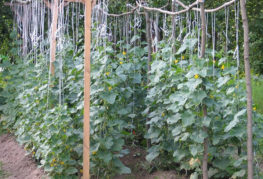
A polycarbonate greenhouse is the best option for continuous cultivation of cucumbers. It retains heat and moisture well, scatters too bright sun rays, due to which the optimal ratio of temperature, humidity and illumination is maintained inside the room. On the frame, you can pull the threads for seedlings of cucumbers (for vertical cultivation).
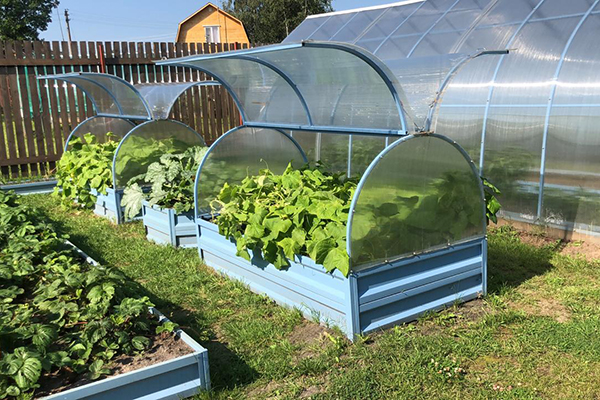
Portable greenhouse
Such structures are created on the basis of wooden bars.
The sequence of actions for creating a greenhouse is as follows:
- They create a drawing and select bars and arcs from a plastic pipe, as well as a metal mesh from which the bottom will be made.
- Treat wooden elements with an antiseptic.
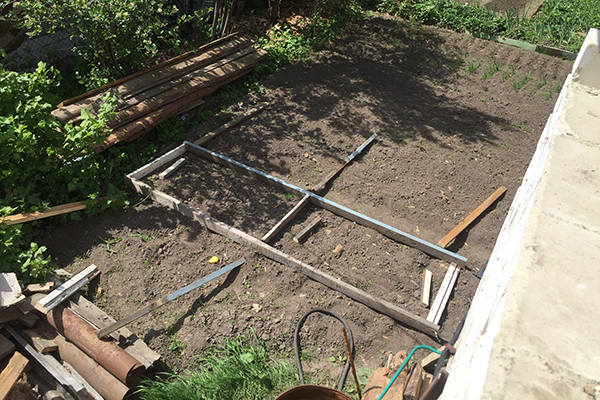
- A box is made from the bars, fixing the elements with self-tapping screws.
- After the perimeter of the box is installed on a predetermined place where the greenhouse will be located, a mesh is laid on the bottom.
- Then, half arcs are formed from plastic arcs - they will be the basis of the greenhouse frame. They are fixed to the box with metal clamps.
- A plastic jumper is installed in the center of the arcs, running along the entire length of the greenhouse. A strong greenhouse film is attached to it, which diverges in the form of a roll from one side and the other.
- The side parts (ends) are covered with polycarbonate, fixed with self-tapping screws.
A similar greenhouse can be moved to another place with the efforts of 1 or 2 people. It can be placed anywhere on the site, including the one that is little used (bad soil or no soil, etc.). The structure can be disassembled for the winter.
Thus, you can make your own greenhouse even at home, without having special skills. However, all work must be carried out very carefully, carefully selecting the material and calculating the dimensions of each part. Then the greenhouse will last a very long time and save the crop from frosts and other negative influences.


and will be published shortly.