When to remove garlic from bulbs for seeds from the garden?
Planting garlic on the site of summer residents is carried out in two ways - with cloves and air bulbs (bulbs). It is necessary to remove garlic from the bulbs from the garden after they are fully ripe. The end of this process can be identified by some external signs.
Growing garlic from bulbs has its pros and cons, which it is better to know about in advance if this method of culture propagation is used for the first time.
Pros and cons of growing garlic from bulbs
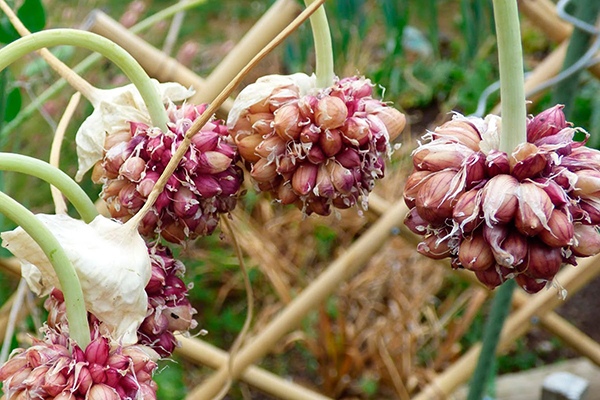
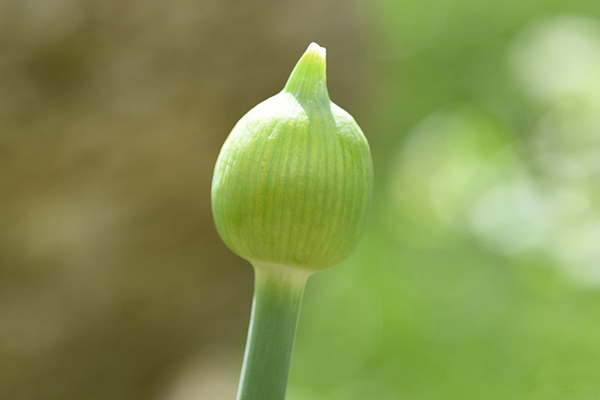
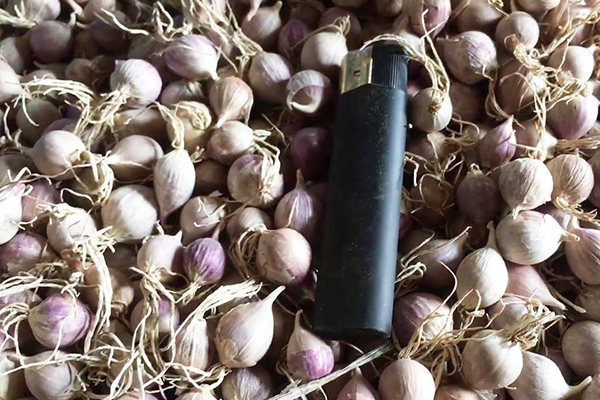
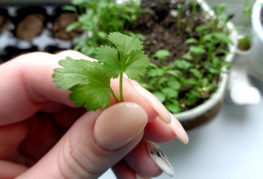
Bulbules are garlic seeds that form on a peduncle in a capsule fruit after flowering. They are referred to as the vegetative organs of the plant. The outer shell is needed by the air bulbs to protect them from the effects of adverse weather conditions and fungal spores. Bulbs are formed at the top of the flowering shoot, which gardeners often call an arrow.
- The seed method of growing garlic takes place in 4 stages.
- First, a small set is formed from the bulbs.
- Then the set turns into a large one-tooth onion.
- The single-tooth, in turn, is converted into a full-fledged head.
The full cycle of growing garlic from bulbs lasts from 2 to 3 years. This method is often used to propagate especially valuable crop varieties.
Method advantages:
- economical use of seeds;
- increased endurance of planting material;
- culture resistance to disease;
- long shelf life of the crop.
Garlic grown from bulbs is stronger, it has developed roots and lush foliage. With constant planting with tines, the culture will begin to degenerate after 3-4 years, yield decreases, and the heads become small. This is where the method of growing garlic with air bulbs will come to the rescue.
However, this method has some disadvantages:
- storing bulbs before planting causes certain difficulties;
- the material requires additional processing;
- a full harvest from air bulbs can be obtained only in the second year.
The quality of garlic is greatly influenced by the timing of collection and planting of seeds. Bubbles intended for planting must be well ripe.
Terms of harvesting air bulbs
Garlic is often planted for seeds in the winter way (in spring varieties, the formation of arrows begins much later and the bulbs do not always have time to ripen). For planting, select large bulbs containing at least 4 cloves. It is necessary to wait until the formation of peduncles begins, and leave the inflorescences on the strongest and healthiest plants.
In the conditions of the Moscow region, most varieties give ripe seeds in mid-July, in late varieties, the period shifts to early August.
The ripening period depends on both weather conditions and the region where the garlic is grown. In cold climates, the soil warms up later, which means that plant development is delayed.
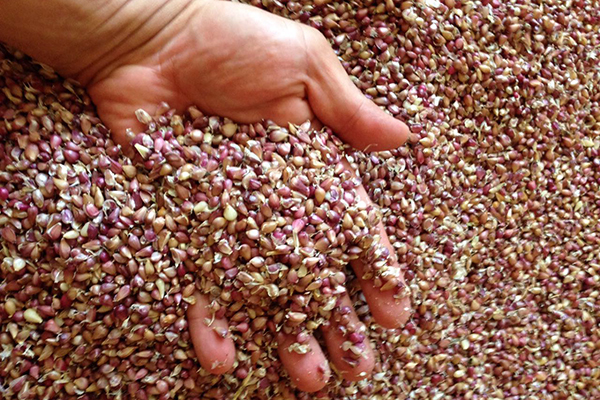
To prepare the seeds, it is enough to leave 2-3 garlic arrows. From them it will be possible to get 100-150 bulbs for planting.
Closer to harvest, you should watch the plants. The following signs will indicate the maturity of garlic and bulbs:
- the curled arrow straightens;
- leaves turn yellow and begin to wither;
- the film covering the air bulbs bursts.
Do not overexpose ripe inflorescences in the garden, otherwise the bulbs may crumble.
On plants from which it is not planned to collect seeds, the arrows are cut off at the very beginning of formation so that all the forces of the garlic are directed to the growth of the heads.
If the inflorescences have already been left for seeds, they must be cut off in due time. The bulbs left after ripening on the arrows fall to the ground on their own, next year the garlic will sprout self-sowing in conditions that contradict the agricultural practices. The distance between plants will be less than intended, which will interfere with their normal development.
Causes of the delayed ripening of bulbs
The maturation of the bulbs can be delayed, sometimes the seeds do not ripen at all. This is influenced by several factors at once:
- Using low-quality planting material. If the cloves were deformed or had signs of disease, the culture will not fully develop, the vegetation process will be delayed or the seeds will not be able to ripen properly.
- Bad land. The development of garlic is influenced by the structure and acidity of the soil. In acidic heavy soil, plants will release arrows with a delay.
- Drought. Garlic needs a lot of moisture to grow normally. Poor watering leads to slower crop development.
- Diseases and pests. Any disease (fusarium, rust, rot) or parasitic insects weaken the plants, which causes growth inhibition. In advanced cases, the culture may even die.
All these reasons should be eliminated in advance. It is necessary to follow the rules of crop rotation, planting garlic after suitable predecessors (these are potatoes, early and cauliflower, zucchini, squash, legumes, green manure, pumpkin), then the likelihood of disease will be less. The acidic soil must be limed. For looseness, peat, river sand, vermiculite are introduced into the soil. The garlic bed is watered in a timely manner.
Collection and preparation of seeds for planting
The plants on which the bulbs have matured are dug up by the roots in dry weather. Then they gently shake off the ground from the garlic and hang it from the ceiling of a well-ventilated barn or attic to dry and ripen. This process will take 3-4 weeks.
It is better to dry the arrows with seeds at a temperature of 18–20 ° C. It is not recommended to separate the bulbs from each other before drying.
After that, the seeds are laid out in paper bags or envelopes, still preserving the integrity of the fetal sac as much as possible. In this form, the bulbs will be stored until they are planted in the ground. It is advisable to avoid sharp fluctuations in temperature and humidity during storage. The optimum storage temperature for seeds is + 18 ° C.
Experienced gardeners advise 2 months before planting before winter to transfer the seeds to the basement, where the temperature is maintained at 4-7 ° C. This measure will help harden the garlic - after planting, the bulbs will easily tolerate frosts, and the grown seedlings will be stronger and healthier.
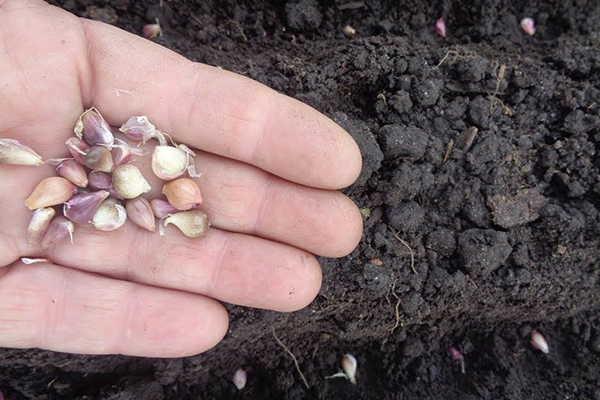
Immediately before planting, the seeds are sorted out, then soaked for the purpose of disinfection in a weak solution of potassium permanganate (for 20 minutes) or in a solution of wood ash (boil 2 tbsp. L. In 2 liters of water, cool, soaking time - 10-12 hours). Then they begin to plant the bulbs in the ground.
In the future, from each bulb with a diameter of 5 mm, it will be possible to obtain a large one-tooth. Seeds with a diameter of 2-3 mm are planted on a separate bed, from which full-fledged garlic is obtained a year later. Very small planting material is not used, it is thrown away.
Sowing in the ground and further care
Planting garlic with seeds can be carried out 1–1.5 months before frost or in early spring, immediately after the snow melts.
Pre-fertilize the garden, making 1 sq. m:
- 3-5 kg of humus;
- 20 g superphosphate;
- 20 g of potassium sulfate;
- 2 tbsp. l. ash.
When planting in spring, a bed fertilized in the fall is leveled and spilled with a hot solution of copper sulfate (1 tbsp. Per 10 liters of water), after which it is covered with a black film for 2-3 days.
Sowing is carried out in the standard way - in lines with an interval of 20-25 cm.Approximately 50 bulbs are consumed per running meter. Large seeds are planted to a depth of 4–5 cm, the smaller ones are buried by 3 cm. Then the bed is mulched with sawdust or peat, the layer thickness is 2–3 cm.
Seeds planted before winter are sprinkled with sand and slightly huddled, and after the first snowfall they are covered with snow. So that the snow mass is not blown away, it is slightly compacted with a shovel.
In the spring, the beds are watered 1-2 times a month in warm weather. At the beginning of April, fertilizing with nitrofos is carried out (15 g per 1 sq. M). At the beginning of summer, ammophoska (15 g per sq. M) and wood ash (0.5 cups per 1 sq. M) are added.
When to dig out one-toothed teeth and what to do with them next?
By the middle of summer, single cloves of garlic - the so-called one-cloves - will form from the bulbs in the ground. They are dug up along with the main harvest of winter garlic after the leaves turn yellow. It is not worth waiting for the complete withering away of the tops, otherwise the search for chives underground will be complicated.
One-teeth are dug out with a shovel and immediately put into the shade: in the sun the planting material "glazes", which makes it unsuitable for further planting. Garlic is dried under a canopy or in a shed, then it is tied in bunches and hung until autumn in a darkened, ventilated room. Before winter, one-toothed beetles are planted in the usual way and the next summer they get full heads.
Bulb garlic can be grown in a direct way. In this case, the one-toothed teeth are not removed from the ground. Sevok stays in the soil for the winter and germinates next spring. In winter, he needs to provide good shelter by taking snow retention measures. Particularly large bulbs can be obtained with this growing method. The crop is harvested within the generally accepted time frame.
When growing garlic by seed, it is important to observe the timing of harvesting planting material. In this case, the air bulbs will be large, they will have time to fully ripen. If the bulbs are not removed in time, their self-seeding will occur, which threatens to worsen the conditions for the development of such garlic. The method of growing a culture from air bulbs allows you to get large heads suitable for long-term storage.


and will be published shortly.