Growing medlar in the garden and tree care features
The cultivation of subtropical medlar is possible in the Russian climate, although it is not yet very popular. The representative of the Rosaceae family is often called ezgil, the cup tree. It requires careful maintenance, but the benefits of its fruits are worth all the effort.
Description, types and varieties
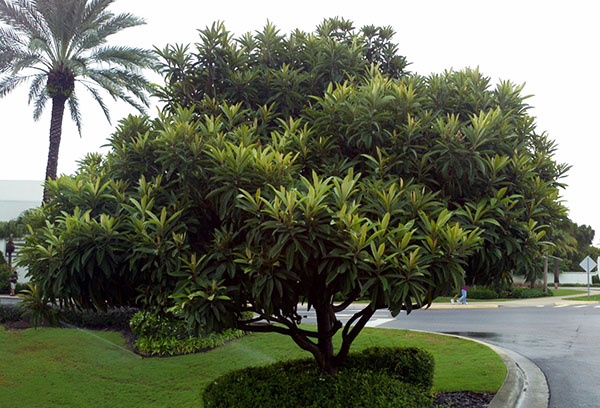
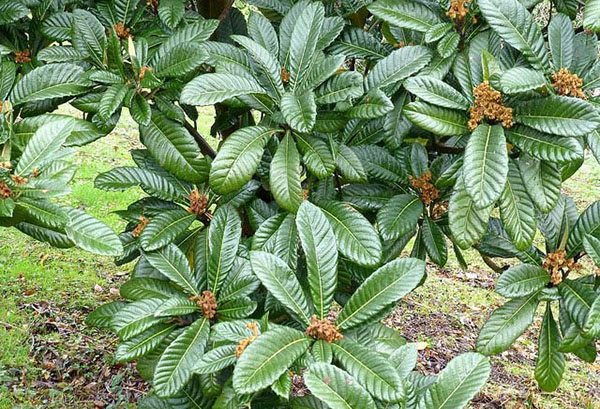
In its natural environment, the height of the tree reaches 8 m. The leaves are large, leathery. Their upper surface is glossy, the lower one is velvety. Flowers of white or cream color have a pleasant aroma. Small fruits are not only tasty, but also useful with a high content of vitamins and minerals.
In total, there are about 30 types of medlar, the most famous are Caucasian medlar (Germanic) and Japanese medlar (lokva). These species differ significantly from each other.
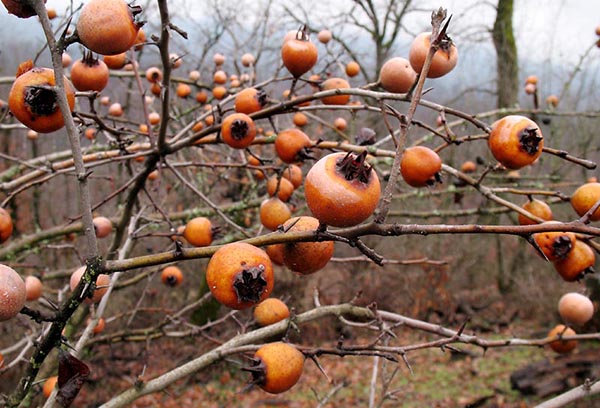
- The Caucasian medlar is a hardy deciduous species. The growing season lasts until cold weather, first-year shoots often freeze slightly. It blooms in May with small white flowers, which turn pink after a few days and acquire an aroma that attracts pollinating insects. The brown-red fruits ripen by autumn, but they can only be eaten after frost. The native land of the species is the northern part of Iran, the southern and southeastern regions of Asia Minor.
Advice
The varieties Sladkaya Dracheva, Karadagskaya, Goytkhskaya, Sochinskaya, Khvamli are recommended for cultivation on the territory of the Russian Federation.
- The Japanese medlar blooms from September to March, the fruits ripen in June. It is interesting that the fruits of the Japanese medlar, which have a yellow color, come in various shapes - from spherical to flattened or pear-shaped. Large leaves are slightly wrinkled.
In the open field, the Japanese medlar is grown on the Crimean peninsula, but more often at home or in greenhouses.
How to plant a medlar
Cultivated in the open field of temperate latitudes, medlar rarely grows above 3 meters. Therefore, the place for planting is chosen so that the tree is constantly well illuminated - this guarantees a high yield.
Medlar is undemanding to soil, but prefers slightly acidic or neutral. It is important to pay attention to the depth of the groundwater: the distance to them should be at least 1 m.
Advice
When choosing a place, take into account the comfort zone of the tree - at least 1.5x1.5 m for each. In this area, you should not plant other crops that take nutrients from the soil.

Planting seedlings
Medlar seedlings are purchased from local nurseries so that the plant is guaranteed to be adapted to climatic conditions. You can grow seedlings yourself (this will be discussed below).
The landing algorithm is pretty simple.
- The planting hole is dug with a volume of one third larger than the earthen clod of the seedling.
- A drainage layer is placed at the bottom of the pit, then fertilizers are poured (usually complex fertilizers plus bone meal).
- Nutrient soil mixture for medlar is prepared from peat, humus, sand and excavated soil, taken in equal volumes.
- The seedling is placed in a hole, the roots are covered with a prepared substrate.
- Immediately dig in a support for the tree.
- Water well, the trunk circle is mulched with a thick layer of compost or humus.
Care
There are no particular difficulties in caring for a medlar - in fact, it is similar to caring for the usual fruit trees.
Watering
The medlar is watered sparingly, avoiding waterlogging and, moreover, stagnation of water in the near-trunk circle.
Advice
During flowering and fruit setting, watering should be regular so that the drying out of the soil does not affect the yield.
Top dressing
Medlar gratefully responds to feeding with mullein (1: 8) with organic fertilizers.
Feeding schedule:
- seedlings and young trees - every three weeks;
- mature trees - 2-3 times per season.
Pruning
They are usually pruned to form the crown - you always want to have a beautiful tree. But sanitary pruning is a mandatory procedure on which the health and yield of the medlar depends. Dry, damaged, diseased branches are regularly removed. In the spring, the crown is thinned so that the unpromising branches do not interfere with the full-fledged fruit setting. Frozen shoots are removed at the same time.
Advice
Experts recommend shortening the branches of the seedlings by half in the first two or three years.
Pests and diseases
Usually the medlar is annoyed by worms, aphids and scale insects, which get rid of with insecticides:
- Fitoverm - 20 ml / 10 l of water;
- Insegar - 5 g / 10 l of water;
- "Lepidocide" - 30 g / 10 l of water.
Instead of chemicals, you can use infusions of nettle, tansy, wormwood.
During the growing season, caterpillars and other leaf-eating insects are likely to attack. To prevent troubles in spring and summer, the tree is sprayed three times with "Karbofos" (0.3%) and "Chlorophos" (0.2%).
Advice
Fumigation gives a good result. Wet straw is laid out next to the tree, sprinkled with tobacco dust, set on fire. The process is controlled - the straw should not flare up.
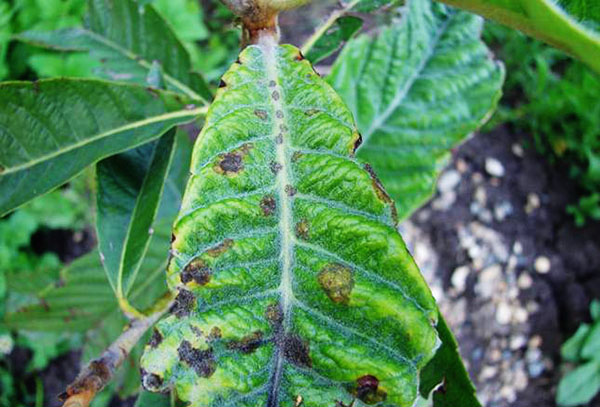
The most likely diseases of the medlar:
- Bacterial burn, manifested by the drying out of branches, shoots, less often - the whole tree. The affected parts are removed and incinerated. Since the disease is dangerous, it is recommended to notify the territorial phytopathology service.
- Spotting - the appearance of light spots, darkening to brown and necrosis. The tree is treated by spraying with copper-containing fungicides.
- Root rot occurs when the soil is waterlogged (this may be due to violations of the irrigation regime or prolonged rains). Counteraction - the introduction of fungicides into the near-trunk circle.

Reproduction
For reproduction, seeds, layering, cuttings are used. Often used is the grafting of medlar of both types on fruit trees and shrubs - quince, hawthorn, pear.
Germinating seeds
It is possible to grow medlar seedlings from seeds in the open field of regions with mild winters. In temperate latitudes, seeds are germinated at home or in greenhouse conditions.
The germination of medlar seeds-drupes during storage decreases, so it is recommended to plant fresh seeds. This determines the sowing time - the end of October or the first decade of November.
Germination at home
- The seeds are kept in a stimulant solution for 2-3 hours.
- The substrate is made up of humus, sand, turf and leafy soil in equal amounts. You can use commercially available blooming soil.
- Do not forget about the drainage holes on the bottom of the germination container and the actual drainage.
- 5-6 seeds are planted in a container with a volume of 1-1.5 liters. Planting depth - 3-4 cm.
- Crops are regularly moistened. To reduce moisture evaporation and preserve the microclimate, the plantings are covered with foil. Regular ventilation is required for 2 hours daily.
- Seedlings appear at 7-8 weeks.
- The protective film is removed when the sprouts grow up to 2-3 cm.
- When the seedlings form two or three true leaves (their age will be about three weeks), they are seated in separate pots.
They are planted outside in spring, when warm weather sets in without the threat of frost. The transplant is carried out by transshipment without destroying the earthen lump.

Germination in the open field
For germination of seeds, it is recommended to allocate a small bed, clearing it of weeds. Under natural conditions, seeds germinate for a long time - several years. For a garden plot, such a period is unacceptable.Experienced gardeners recommend keeping the seeds in a 3% sulfuric acid solution for several hours, then rinse them well and soak them with water for a day.
The seeds are planted in moist soil to a depth of 4-5 cm, then the crops are mulched to protect them from winter cold snaps. use sawdust, peat, breathable agrotextile.
The first flowers on the tree will appear in the 4th or 5th year.
Layers
The method is applicable to the Caucasian medlar.
In autumn, the branches are bent to the ground, previously moistened, and fixed. The bark is incised at the point of contact with the ground.
The formation of an independent seedling lasts two years. During this time, he will form a root system, give shoots. The "teenager" is planted in the fall, after leaf fall.
Cuttings
The technique is equally good for both Caucasian and Japanese medlar.
Cuttings are cut 15-20 cm long, they should have 2-3 internodes. The leaves are cut in half, the cuts are treated with wood ash. The bottom end should be cut at a 45 ° angle.
Cuttings are rooted in containers with a thick layer of drainage - they are buried 4-5 cm strictly vertically. Then water it abundantly, cover with a bag.
Containers with cuttings are kept at an elevated temperature.
Advice
The rooting container must be opaque - the roots need complete darkness for growth. It is better to keep rooted cuttings near heating devices.
The cuttings take root for two weeks. Then they are transplanted into a pot, and when the heat is established, they are transferred into open ground.
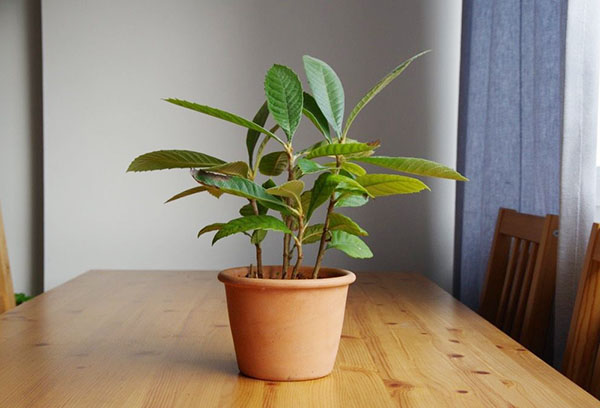
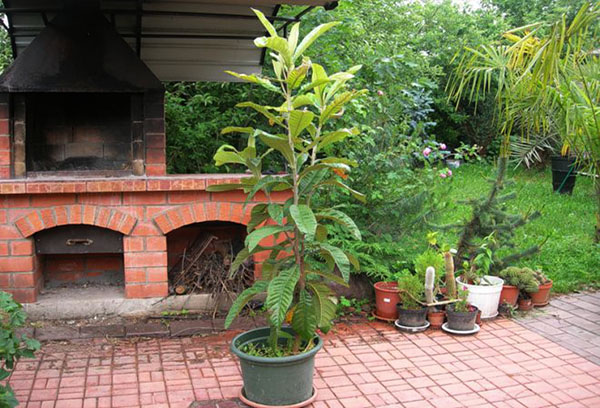
You can plant a medlar not only in the garden, but also at home, on the windowsill. The cultivation and care technology is almost completely consistent with the above. The only difference is that the Caucasian species rests in winter, so it is advisable to move it to a cool room, for example, to a closed, but not insulated northern loggia or balcony.
Growing a medlar in a garden is no more difficult than apple tree... Proper care guarantees a good harvest of fruits that are tasty and surprisingly healthy.


What, nafig, layering on the Caucasian medlar, in which the tree is breezy, the branches stick out strictly with candles up