Grouse imperial - rules for growing a magnificent flower
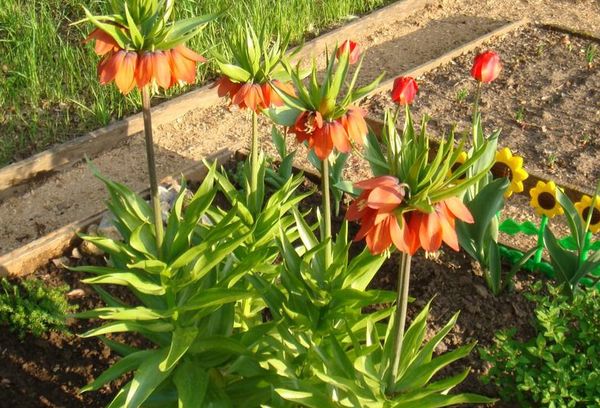
"Grouse imperial" is a beautiful, large flower blooming on a powerful stem, decorated with large leaves.
Short description
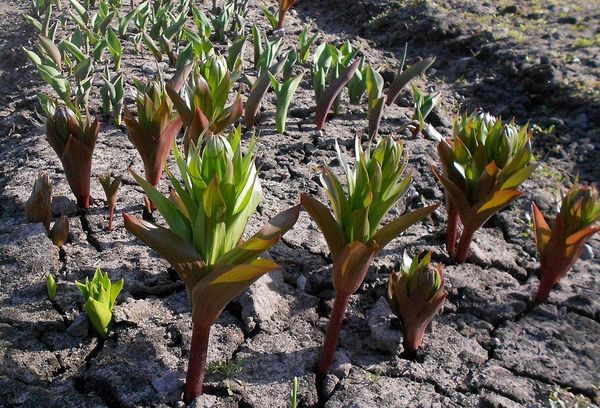
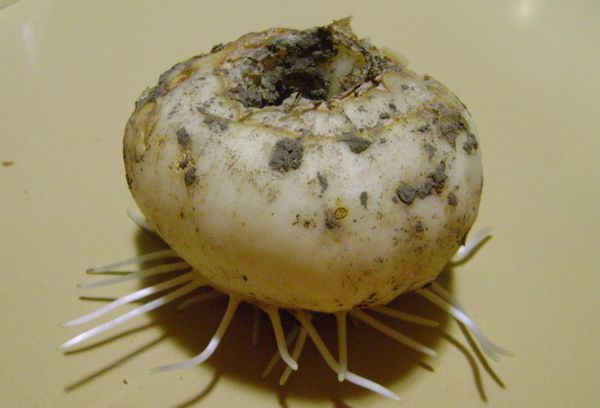
A perennial bulbous plant with a short flowering period (only 20 days) in late spring. The bulbs consist of scales that have grown together. In the sinuses, buds grow, which gardeners use to propagate flowers. After planting, a powerful stem grows from the bud, densely covered with beautiful shiny oblong leaves, with pointed tips.
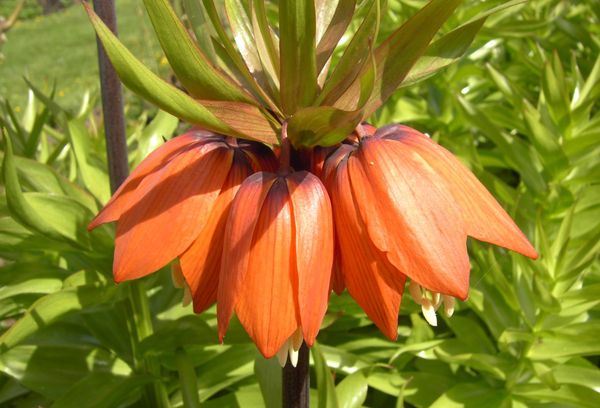
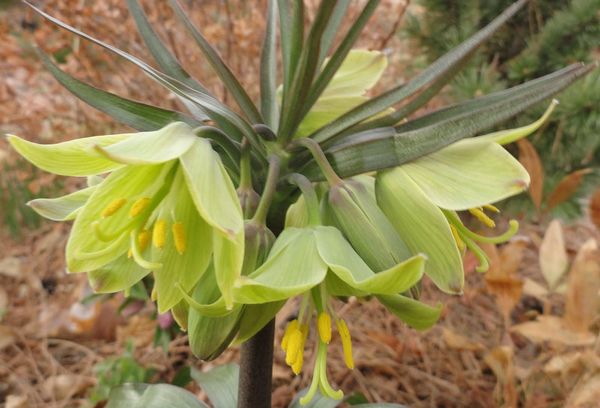
In due time, a powerful peduncle is formed at the top of the stem, the length of which is at least 60 cm. The flowering plant resembles an exotic palm tree with clusters of flowers in the form of bells. Depending on the variety, the petals are colored red, pink, yellow or white. Luxurious flowers also have a drawback: a peculiar scent that scares off mice and moles. These rodents never dig their burrows closer than 50 cm with a bed of hazel grouses.

Advice
Imperial hazel grouses are used to decorate the site, you should not cut them for bouquets.
Reproduction methods
Grouse imperial propagate in two ways using rhizomes. Breeders also use the seed method. But this technique is not suitable for us, because before the first flowering, we will have to take care of the plantings for 6-7 years. Let us examine in more detail the main methods of obtaining seedlings.
With the help of children
Each adult onion forms up to 2 babies. We carefully separate such a scale from the mother bulb and plant it in a school. Budding usually occurs after 2 years. Let's say right away that the method is laborious, takes a lot of time, but this is the only technique that gives you complete confidence that your flowers will bloom and decorate the site.
Receiving and landing babies:
- In the summer, we select a strong and healthy bush and dig it up.
- We sterilize the knife. To do this, it is enough to wipe it with a napkin dipped in cologne or alcohol.
- We make a small scraping on one of the sides, its diameter should not exceed 20 mm.
- We leave the bulb in the open air to dry the wound. Scraping is not recommended; it should simply dry.
- We place the onion in a container with dry sand and put it in a dry, well-ventilated place.
- The first roots appear on the bulb - we spray it with a solution of any fungicide and plant it on the garden bed.
- We remove all shoots. This must be done in order to direct all nutrition to the daughter kidney. She must develop quickly and give us a new seedling.
- We separate the scale with a sprout from the mother bulb and plant it in a school, where a new plant will develop. At the end of the season we will have a new hazel grouse bush.
By dividing the bulb
For this method, only strong and disease-free planting material is suitable:
- In the fall, we select mature, well-developed plants and dig them up.
- We check the bulb for mechanical damage.
- We disinfect a sharp knife and carefully cut the rhizome in half.
- We moisten the cut sites with a weak solution of potassium permanganate and sprinkle with wood ash.
- We plant individual parts in the garden and cover them for the winter.
Such a plant can bloom the next year.
Planting hazel grouses
The trunk of an adult bush begins to gradually dry out and tilt down - which means it's time to start working on harvesting planting material. This happens at the end of June. If you dig out the bushes too late, you can get a bulb with a rotten root system.Therefore, rhizomes taken out of the soil late should be subjected to cold (stratified) and only after that continue to work.
If we use purchased planting material, the best time to work with it is no later than the beginning of September.
We begin to prepare the landing site in advance:
- For 12-14 days we dig a hole, with a depth of 350-400 mm and dimensions of 400 × 400 mm. The distance between plants is 250-300 mm.
- We fill the hole with soil from a mixture of humus, peat and sand and fill it with water.
- We hammer a peg into the soil so that it protrudes from the ground by at least 500-600 mm.
- Around the peg, we pour a slide of sand and put several seedlings.
- We fill up the remaining distance with prepared soil.
- Water the plant and lay a layer of mulch on top.
Imperial hazel grouse care
This process is broken down into several stages and major works.
We take care of the seedlings
This is a short but painstaking process; it will require a lot of attention and responsibility from the grower. Much depends on the weather conditions after planting the bulbs. Before the first drops in temperature, plants require periodic watering and loosening of the soil under the bushes. But if the autumn is rainy, you will not need to water the hazel grouses.
The soil under the bushes should be constantly loose and moist. If it is wet, the roots will start to rot, the plant will not be able to get enough nutrition, and the flower will die.
In the first winter, the plant must be covered with a layer of fallen leaves or peat. You can use covering material or plastic wrap.
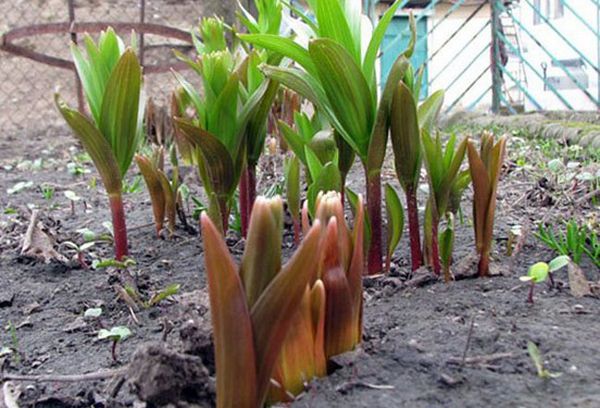
Spring works
In the spring, when the heat is established, we remove the covering material. It is important for the plant to get enough light. We do not touch the soil near the bushes, the root system of the hazel grouse is located close to the surface. Add a layer of mulch and remove all weeds from the garden. Loose the aisles and also add mulch from the bark of deciduous trees.
Next, we begin to apply top dressing under the overwintered flowers:
- take a 10-liter bucket of water, add humus to it and stir everything well;
- we introduce mineral supplements: 1 tbsp. l. superphosphate;
- add according to the instructions a ready-made complex fertilizer for flowers;
- mix the solution well and pour it over the wet soil.
We carry out the second feeding, when the imperial hazel grouse begins to bloom, we use organic matter. Sprinkle the mixture around the bushes and water the soil well. Be sure to place a layer of peat on top.
The third time we add nutrients after the end of budding, in August-September. Add phosphorus-potassium fertilizer. Before winter, fill the space with a mixture of organic matter and peat - this layer will allow the plant to winter well and get the first portion of nutrition in early spring.
Disease and pest control
The imperial hazel grouse is affected by a number of pests and diseases:
- with improper watering, root rot spreads - to eliminate it, it is enough to add a layer of mulch, reduce the amount and volume of watering and treat the flowers with any fungicide;
- pest of all types of daylilies, including hazel grouse, lily beetle, with a black head and a small red body - you will need to treat it with chemicals or just wash it off with soapy water;
- larvae of the onion rattle - you will have to remove and burn those leaves behind the site, on the back of which the pests have laid laying.
We completely remove plants heavily affected by pests or diseases and burn them behind the site. And the place of their growth is treated with a strong solution of potassium permanganate and covered with wood ash. But even healthy bushes of imperial hazel grouse will need to be replanted every 3-4 years in order to avoid diseases and ensure normal development.
The imperial hazel grouses are irresistible in group plantings. Be sure to surround the bushes with tulips, daffodils or haitranuses - such neighbors will set off the beauty of the royal flower and bring new shades to the color scheme.The imperial hazel grouse does not require special care. It is important to monitor the soil moisture level, perform several complementary foods and keep the plant warm during the winter. And in the spring, beautiful, tall stems with bunches of beautiful flowers and pointed foliage located at the top will grow on your site again.
and will be published shortly.